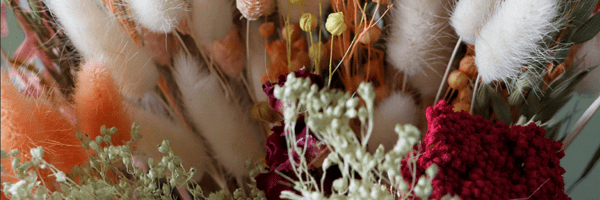
Autumn is the season of cosy sweaters, crisp air, and, of course, pumpkins! While carving pumpkins is a classic autumn tradition, not everyone enjoys the mess (or the short shelf life) that comes with it. If you're looking for a more elegant, nature-inspired way to decorate your pumpkins this year, pressed flowers might just be the perfect solution. This technique turns an ordinary pumpkin into a stunning pumpkin flower masterpiece.
In this guide, we’ll show you how to decorate pumpkins with pressed flowers, creating gorgeous pumpkin flower arrangements that are perfect for your porch, centerpiece, or holiday table.
Why Choose Pressed Flowers?
Pressed flowers bring a delicate, natural beauty to your autumn decor. They:
-
Add a unique, botanical touch to your pumpkin flowers design.
-
Are mess-free and easy to apply.
-
Can last for weeks when properly sealed.
-
Offer a sustainable alternative to carving or using synthetic embellishments.
Whether you collect flowers from your garden or purchase them from a craft store, this DIY project allows you to preserve memories of summer blooms while celebrating the autumn season.
What You’ll Need
Supplies:
-
Fresh or faux pumpkins (real or artificial)
-
Pressed flowers or leaves
-
Mod Podge or craft glue
-
A small paintbrush
-
Clear acrylic spray sealer (optional but recommended)
-
Tweezers (to handle delicate flowers)
-
A soft cloth
Tip: If you don’t have pre-pressed flowers, you can easily make your own by flattening flowers between parchment paper and pressing them inside a heavy book for 1-2 weeks.
Step-by-Step Instructions
1. Prepare Your Pumpkin
Wipe your pumpkin clean with a damp cloth to remove any dirt or dust. If you’re using a real pumpkin, make sure it’s completely dry before starting.
2. Plan Your Design
Lay out your pressed flowers and experiment with different arrangements before gluing anything down. Think about creating beautiful pumpkin flower arrangements such as floral wreaths, cascading designs, or minimalist accents.
3. Apply the Glue
Using a small paintbrush, apply a thin layer of Mod Podge or craft glue to the spot where you want your first flower to go.
4. Place the Flower
Using tweezers, gently position the pressed flower on the glue. Press lightly with your fingertip or a soft cloth to smooth it out and remove any air bubbles.
5. Seal the Design
Once all flowers are in place and the glue has dried, brush a light coat of Mod Podge over the entire surface of the pumpkin to seal and protect your design.
For extra durability, finish with a clear acrylic spray sealer once everything is completely dry.
6. Display Your Creation
Your pressed flower pumpkin is now ready to shine! Place it on your dining table, mantel, or porch for a beautiful seasonal statement piece.
Styling Ideas
-
Romantic Rustic: Use soft pinks, whites, and greenery for a shabby-chic farmhouse vibe.
-
Bold & Bright: Mix sunflowers, marigolds, and zinnias for vibrant pumpkin flowers that pop.
-
Monochrome Magic: Stick to one color palette, such as deep burgundy or golden yellow, for a modern aesthetic.
-
Mini Pumpkins: Create a set of tiny, matching pumpkins for a stunning centerpiece.
Final Thoughts
Decorating pumpkins with pressed flowers is a simple, beautiful way to bring a touch of nature into your autumn decor. Whether you're crafting a single pumpkin flower centerpiece or an entire collection of pumpkin flower arrangements, this mess-free project allows you to create lasting memories and stunning seasonal decor.
Gather your supplies, let your creativity flow, and watch as your pumpkins transform into floral masterpieces that will wow guests and bring a touch of whimsy to your home this autumn.
FAQs
How long will a pressed flower pumpkin last?
Real pumpkins can last 1-2 weeks indoors, or longer if kept in a cool, dry place. Faux pumpkins can last indefinitely.
Can I use dried flowers instead of pressed flowers?
Yes, but pressed flowers adhere more smoothly to the pumpkin’s surface. Dried flowers with more dimension can be used for a textured, 3D effect.
Do I need to seal my pumpkin?
Sealing isn’t strictly necessary but highly recommended. It protects your design from moisture and helps the flowers stay in place.
What if my flowers start to peel off?
Apply a little extra glue under the lifted edge and press it down gently. Once dry, reseal the area with Mod Podge.
Can kids help with this craft?
Absolutely! Kids can help plan the design and place flowers, though an adult should handle the glue and sealing steps.


