Looking to add a touch of nature and elegance to your home décor? DIY dried flower candles are a simple, beautiful way to bring floral charm into your space. Whether you're crafting a thoughtful gift or indulging in a creative weekend project, this beginner’s guide will walk you through every step of making your own dried flower candles at home.
Why Make Dried Flower Candles?
Dried flower candles are more than just visually stunning—they’re a great way to personalize your space with your favorite flowers, colors, and scents. Handmade candles also make heartfelt gifts for birthdays, holidays, or weddings, and you can tailor them to any aesthetic, from rustic farmhouse to modern minimalist.
What You’ll Need
Before diving in, gather these supplies:
Materials:
-
Wax – Soy wax is great for beginners and eco-friendly, but beeswax or paraffin works too.
-
Wicks – Choose pre-tabbed cotton wicks for easy handling.
-
Containers – Glass jars, tins, or vintage teacups work perfectly.
-
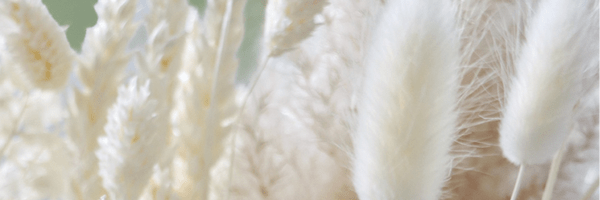
Dried flowers – Pressed or dried botanicals like lavender, rose petals, chamomile, or daisies.
-
Essential oils (optional) – For fragrance.
-
Wick stickers or hot glue – To secure the wick.
-
Craft sticks or wick holders – To keep the wick centered.
-
Double boiler or microwave-safe container – For melting the wax.
-
Tweezers – To place dried flowers carefully.
Step-by-Step Instructions
1. Prepare Your Workspace
Cover your surface with newspaper or parchment paper to protect from spills. Lay out all your tools so everything is within reach.
2. Secure the Wick
Use a wick sticker or a dab of hot glue to attach the wick to the bottom center of your container. Wrap the top of the wick around a stick or wick holder to keep it upright and centered.
3. Melt the Wax
Using a double boiler, gently melt your wax over low heat. If you're using a microwave, heat it in short intervals (30 seconds at a time), stirring frequently until fully melted.
4. Add Fragrance (Optional)
Once the wax is fully melted, remove it from heat and stir in essential oils. A general guideline is 1 oz of oil per 1 lb of wax, but check the recommendations for your specific oil.
5. Pour a Thin Layer
Pour a small amount of wax into the container—just enough to cover the base. Let it cool for a minute until it starts to set slightly. This helps anchor any flowers at the bottom.
6. Add Dried Flowers
Using tweezers, gently press dried flowers against the sides of the container. You can also embed some into the wax surface for a more artistic look. Try to avoid placing flowers too close to the wick, as this can become a fire hazard.
If you’re wondering how to keep your arrangements looking fresh over time, check out our guide on the best ways to dust and clean dried flower arrangements.
7. Pour the Remaining Wax
Once your flowers are in place, slowly pour the rest of the wax into the container. Leave about half an inch of space at the top. Make sure the wick stays centered.
8. Let it Set
Allow the candle to cool and harden for several hours at room temperature. Don’t move it while it's setting to avoid cracks or uneven surfaces.
9. Trim the Wick
Once the candle has completely hardened, trim the wick to about 1/4 inch.
Tips for Success
-
Use pressed flowers for a cleaner look and easier embedding along the jar edges.
-
Avoid overloading with botanicals. Too many can interfere with the burn or become a safety issue.
-
Experiment with layering—pour wax in layers and embed different flowers in each.
-
Label your candles with the date and scent used if you're gifting or storing them.
Safety Note
Always burn your candle on a heat-resistant surface and never leave it unattended. Some dried flowers may catch fire if placed too close to the wick, so use minimal botanicals and keep them on the outer edges of the wax.
Ready to Start?
Dried flower candles offer a perfect blend of nature and creativity. With just a few supplies and a bit of patience, you’ll have your own floral-scented candles that look like they came straight from a boutique. Whether you're crafting for fun, gifting with love, or setting the mood at home—this DIY is a great place to start.
Happy candle-making!
Frequently Asked Questions (FAQs)
1. Can I use fresh flowers instead of dried ones?
No, fresh flowers contain moisture that can interfere with the wax setting and may rot or mold inside the candle. Always use fully dried or pressed flowers for best results and safety.
2. Will the flowers catch fire when the candle burns?
If the flowers are placed too close to the wick, they can catch fire. To avoid this, embed flowers along the sides or at the base, and keep the immediate area around the wick clear.
3. Can I scent my candles with perfume instead of essential oils?
It’s not recommended. Perfumes often contain alcohol and synthetic compounds that may not burn cleanly or safely. Use essential oils or fragrance oils made specifically for candle-making.
4. What wax is best for beginners?
Soy wax is beginner-friendly, easy to work with, and burns cleanly. Beeswax and paraffin can also be used, but they have different melting points and behaviors, so they require more experience.
5. How long should I let the candle cure before burning?
Let your candle cure for at least 24–48 hours before burning. This allows the wax and fragrance to settle, improving scent throw and burn quality.
6. Can I reuse old jars or containers?
Absolutely! Just make sure they are heat-safe, clean, and dry before pouring in the wax.
7. How do I clean up wax spills?
Allow the wax to harden, then scrape it off with a blunt tool. For leftover residue, apply a little heat (like a warm cloth or hair dryer) and wipe it away with paper towels.


