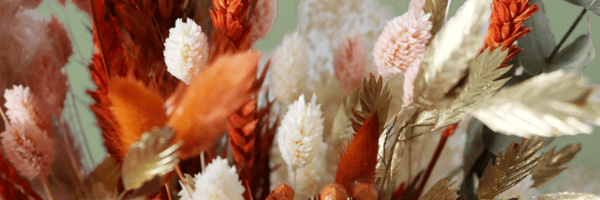
Looking to add a natural, rustic charm to your home decor? DIY dried flower wall art is the perfect blend of creativity and elegance. Whether you're an experienced crafter or just looking for a weekend project, this guide will walk you through how to create beautiful wall art using dried flowers—no professional skills required!
In this step-by-step tutorial, you'll learn how to make your own pressed flower wall art, preserve blooms, and design stunning botanical displays for any room in your home.
If you love working with florals, you might also enjoy our tutorial on how to make a dried flower resin coaster—a fun way to preserve blooms in a functional and decorative format.
Why Choose Dried Flower Wall Art?
Before we dive into the tutorial, here’s why dried flower wall art is so popular:
-
Eco-friendly and sustainable
-
Adds a vintage, natural vibe to interiors
-
Budget-friendly home decor solution
-
Highly customizable with personal meaning
Whether you use flowers from your garden, a special bouquet, or store-bought dried blooms, the end result is timeless and unique. Browse our full range of dried flower bouquets and arrangements to find the perfect stems for your art.
What You’ll Need
To create your own DIY dried flower wall art, gather the following supplies:
Materials:
-
A variety of dried or pressed flowers (roses, baby’s breath, lavender, daisies, etc.)
-
Picture frame or glass frame (size of your choice)
-
Parchment or wax paper
-
Heavy books or a flower press (if pressing flowers yourself)
-
Tweezers (for delicate placement)
-
Clear glue or double-sided tape
-
Cardstock, fabric, or decorative paper (for background)
-
Scissors
Step-by-Step Tutorial
Step 1: Select & Dry Your Flowers
If you don’t have pre-dried flowers, here’s how to dry or press your own:
-
Pressing Method: Place fresh flowers between parchment paper, then press them inside a heavy book. Leave for 7–10 days.
-
Air-Drying Method: Tie flower stems with twine and hang them upside down in a dry, dark place for 1–2 weeks.
Tip: Use flowers with flat heads and thin petals for best results.
Step 2: Plan Your Design
Before gluing anything down, arrange your flowers on a clean surface. Consider symmetry, negative space, and color contrast.
-
Do you want a minimalist design or a full bouquet layout?
-
Try placing large blooms as focal points and using smaller sprigs as fillers.
Take a photo of your layout to reference during assembly.
Step 3: Prepare the Background
Choose a background that complements your flowers:
-
Neutral cardstock for an elegant look
-
Burlap or linen fabric for a rustic feel
-
Watercolor paper for a handmade touch
Trim it to fit your frame. Secure it inside the frame’s backing if needed.
Step 4: Attach the Flowers
Using tweezers, carefully glue each flower in place:
-
Apply a thin layer of clear-drying glue to the back of each flower.
-
Gently press onto your background.
-
Allow at least 2–4 hours to dry completely.
Step 5: Frame Your Art
Once dry, place your artwork into the frame:
-
For a modern look, use a glass floating frame to create the illusion that the flowers are suspended.
-
Ensure all elements are flat to avoid smudging or damage.
Secure the backing, clean the glass, and your artwork is ready to hang!
Display Ideas
Here are a few ideas to showcase your dried flower wall art:
-
As part of a gallery wall
-
Above your bed or desk
-
In a bathroom or entryway for a botanical touch
-
Paired with calligraphy or quotes for a personalized gift
Final Tips for Success
-
Use tweezers for precision and avoid damaging delicate petals.
-
Store unused dried flowers in an airtight container away from light and moisture.
-
Don’t rush the pressing process—well-pressed flowers will last longer and look better.
FAQs
1. How long does dried flower art last?
With proper care, dried flower wall art can last 1–3 years or longer. Keep it out of direct sunlight and away from humidity.
2. Can I use fresh flowers?
Fresh flowers must be dried first—using them fresh will cause wilting and mold.
3. Can I use Mod Podge or resin to preserve the flowers?
Yes! Mod Podge works well as a sealant. For long-term preservation, consider embedding flowers in resin for a glossy finish.
