
Dried pumpkin flower arrangements are a beautiful way to bring a cosy, autumnal vibe into your home. Perfect for autumn or even as a rustic centerpiece, these arrangements are both charming and long-lasting. In this guide, we'll walk you through everything you need to know to create a stunning arrangement featuring pumpkin flowers step-by-step.
Materials You’ll Need
Before you start, gather these materials:
-
A medium or large pumpkin (real or faux)
-
Floral foam or chicken wire
-
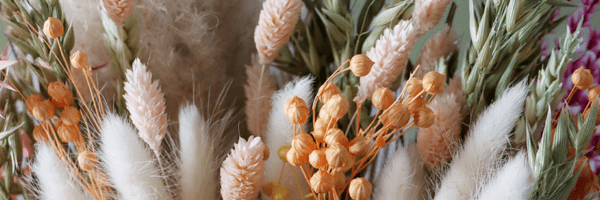
Dried flowers and foliage (e.g., eucalyptus, wheat, pampas grass, dried roses, pumpkin flowers)
-
Scissors or floral shears
-
Hot glue gun or floral tape
-
Optional: Spray paint or metallic accents for extra flair
Before you begin arranging, take a look at our guide on Creating an Autumn Tablescape with Dried Flowers for Seasonal Elegance - perfect if you’re planning to style your finished arrangement as part of a cohesive seasonal display.
Step-by-Step Instructions
Step 1: Prepare the Pumpkin
Cut a circular hole at the top of your pumpkin, similar to how you would for carving a jack-o'-lantern. Scoop out the seeds and pulp if it's real. If you want the arrangement to last longer, line the inside with plastic wrap or use a faux pumpkin.
Tip: Spray the inside of a real pumpkin with a light bleach solution to slow down decay.
Step 2: Add Your Base
Place floral foam or chicken wire inside the pumpkin to hold your stems securely. If you’re using floral foam, soak it slightly so it’s damp but not dripping wet. This helps fresh stems stay hydrated if you’re mixing dried and fresh flowers, including pumpkin flowers.
Step 3: Start with Greenery
Begin by adding your dried greenery to create a base shape. Eucalyptus, preserved ruscus, or olive branches work beautifully. Spread them evenly to form a balanced structure.
Step 4: Add Focal Flowers
Choose your statement pieces—these could be dried sunflowers, hydrangeas, or protea. For a truly autumnal look, include a few pumpkin flowers to add color and a seasonal touch. Place them strategically around the arrangement, usually in odd numbers for a natural look.
Step 5: Fill in the Gaps
Add filler materials like wheat, pampas grass, or smaller dried blooms. Layering textures creates depth and visual interest, making your pumpkin flower arrangement stand out.
Step 6: Final Touches
Once you’re happy with the arrangement, step back and adjust any uneven areas. Consider adding:
-
Mini pumpkins or gourds on floral picks
-
Feathers or dried seed pods for texture
-
A touch of metallic spray paint for a festive glow
Styling and Display Tips
-
Place your arrangement in the center of your dining table or on a mantelpiece.
-
Surround it with candles for extra warmth.
-
Pair with natural fabrics like burlap or linen for a rustic, farmhouse feel.
-
If using a real pumpkin, display it in a cool area to prolong its life.
Final Thoughts
Creating a dried pumpkin flower arrangement is a simple yet stunning way to decorate for the season. With a few supplies and some creativity, you can craft a centerpiece that brings warmth and charm to your home. Plus, it's a fun, hands-on project that's perfect for autumn weekends!
If you’re looking for another creative fall project, check out our guide on Decorating Pumpkins with Pressed Flowers. It’s a unique twist on seasonal décor and pairs beautifully with your dried pumpkin flower arrangement.
Whether you're preparing for Autumn or just want to add a touch of rustic elegance to your space, this DIY featuring pumpkin flowers is sure to impress.
FAQs
1. How long will a dried pumpkin flower arrangement last?
If using a real pumpkin, it typically lasts 1-2 weeks. A faux pumpkin can last indefinitely, and dried flowers, including pumpkin flowers, can stay beautiful for months with proper care.
2. Can I mix fresh and dried flowers together?
Absolutely! Just make sure to use floral foam with a little water for the fresh stems and keep them separate from fully dried elements.
3. How do I prevent mould in my arrangement?
Line the inside of the pumpkin with plastic wrap and avoid overwatering. Keep the arrangement in a cool, dry spot.
4. What are the best dried flowers to use?
Wheat, lavender, statice, pampas grass, eucalyptus, dried hydrangeas, and pumpkin flowers are all popular choices for fall arrangements.
5. Can I reuse the dried flowers next year?
Yes! If stored carefully in a dry, dark place, many dried flowers can be reused for future arrangements.


